In order set up SE-Tracker, you need first to download the App. There are several ways to do it. 1. Search it on Google play or Apple store.
For Android Phones, enter into play.google.com and type SeTracker or SeTracker2, then you can download it in your phone.

For ios phones, search SeTracker or SeTracker2 in Apple store. Then you can see app as follow.
2. Scan QR code on the packing box and which is always you can find at the bottom of boxes or in the watch interface for some models.
Second, create user account on the application. 1. Register Account.
2. Scan or enter into the device ID.Each device has only one unique ID, it can be only be used once, and it is the access to connect between watch and phone.
3. Device ID. Normally you can find the ID number on the back of the watch or the outside of the box. And it is always with IMEI number. It could be in the form of a barcode or a QR code.
4. Choose language and server location. After you scan the device ID and fill into the account name and password. You got to choose the language and server in you area before you finish it.
And there are 5 sever around world now, they are Hong kong, Asia and oceania, North America, South America, Europe and Africa.
For New Zealand, select Asia and Oceania
After we finished all these, then install the SIM card in the watch and and restart the watch to start adding more details to the se tracker.
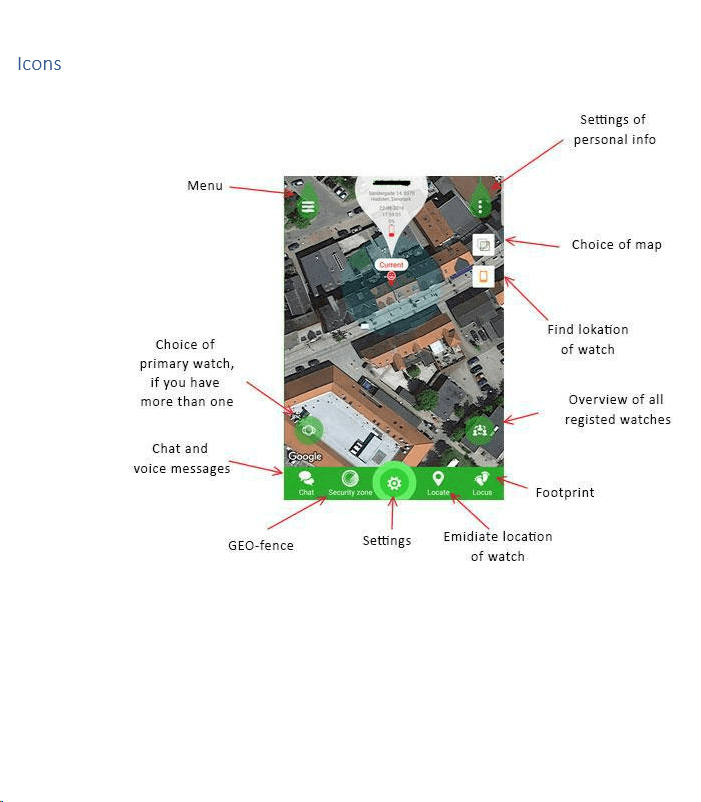
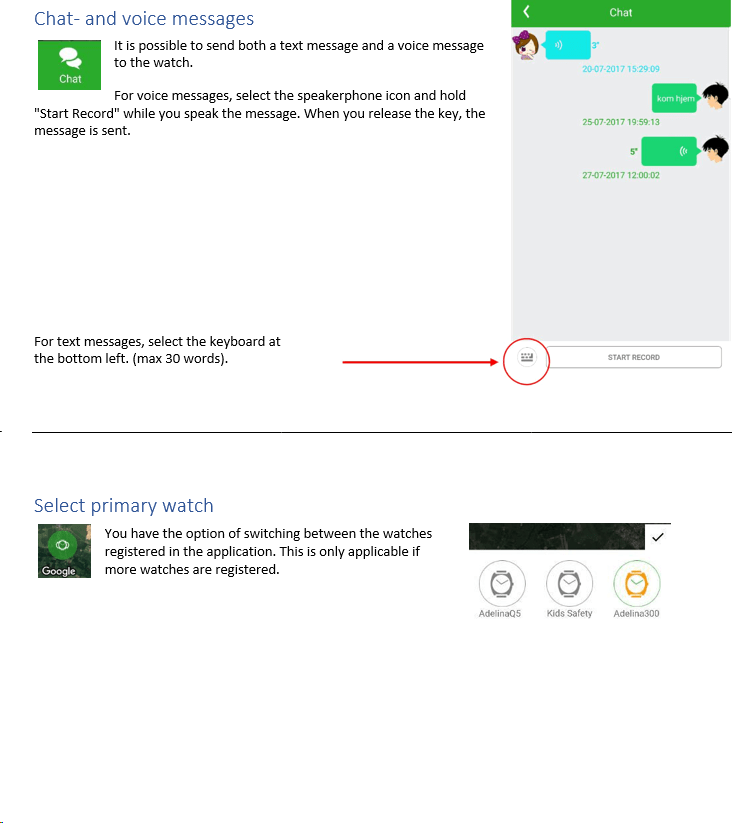
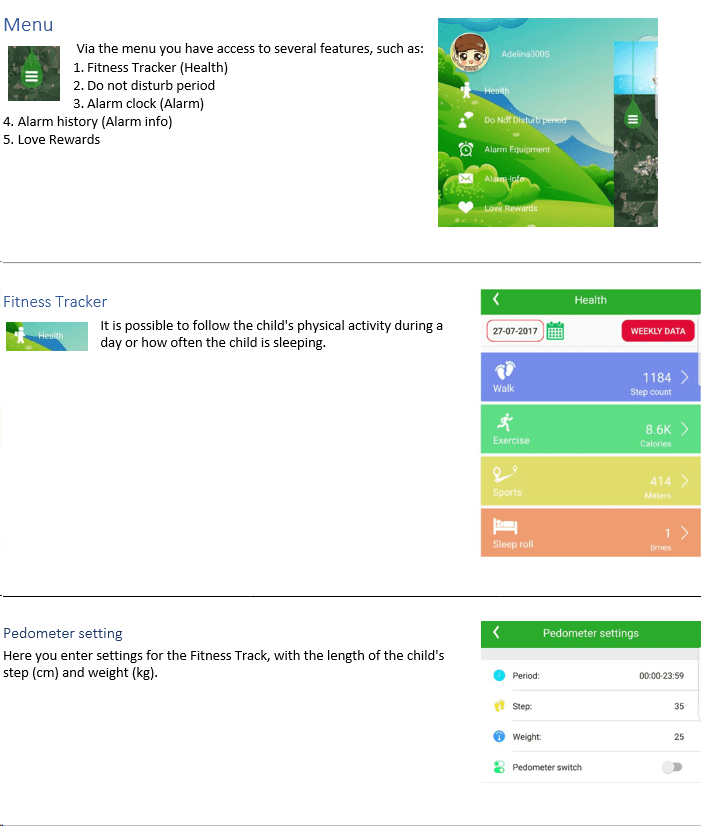
Navigating the Se Tracker


Pingback: Can I use my smartwatch overseas? - Smart Watches NZ